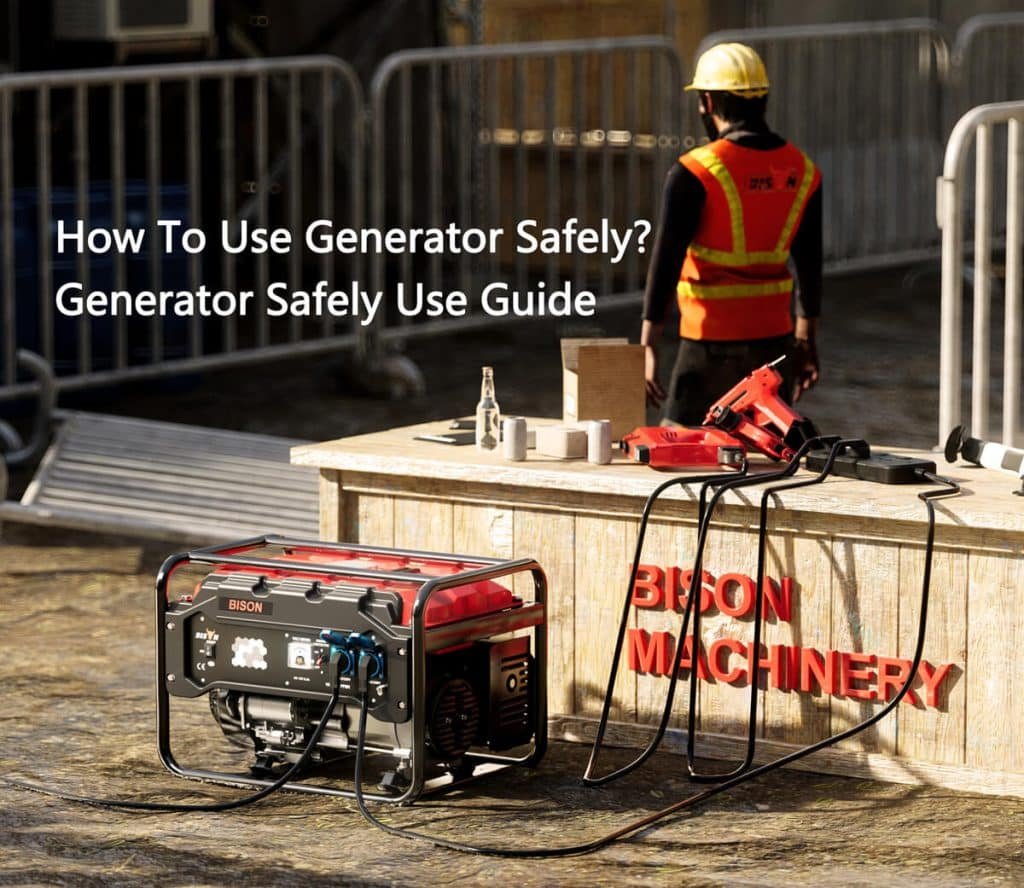
Generators are invaluable tools when the grid goes dark, but their power comes with a critical responsibility: using them safely. Mastering Safe Powermate Generator Use & Operation isn't just about avoiding an inconvenience; it's about protecting yourself, your family, and your property from potentially deadly hazards. This isn't just a manual rewrite; it's a comprehensive guide to understanding your Powermate, anticipating risks, and ensuring every flicker of emergency power is delivered with confidence and safety.
Powermate Generator Safety: At a Glance
- Carbon Monoxide Kills: ALWAYS operate outdoors, far from windows and doors. Use battery-operated CO alarms indoors.
- Electrocution Risk: NEVER connect directly to your home’s electrical system without a qualified electrician and a proper transfer switch. Keep the generator and cords dry.
- Fire & Explosion: Fuel is highly flammable. Refuel only when the engine is OFF and cool, in a well-ventilated area, away from ignition sources.
- Burns: Generator parts get extremely hot. Keep clear during and immediately after operation.
- Read Your Manual: This guide highlights critical points, but your specific model's manual is your ultimate authority. If anything is unclear, call Powermate Customer Service.
- Maintenance Matters: Regular checks and proper servicing extend your generator's life and ensure safe operation.
Understanding the Risks: Staying Safe with Your Powermate
Generators are powerful machines, and with power comes responsibility. Before you even think about starting your Powermate, it's crucial to grasp the potential dangers and how to mitigate them. These aren't just warnings; they are life-saving instructions.
The Silent Killer: Carbon Monoxide (CO) Asphyxiation
Engine exhaust contains carbon monoxide (CO), a colorless, odorless, and highly toxic gas. It can quickly build up in enclosed spaces, leading to illness, unconsciousness, and death. This is perhaps the most insidious hazard because you can't see or smell it.
Your Action Plan:
- Operate Outdoors Only: ALWAYS run your Powermate generator outdoors, in a well-ventilated area. Never run it inside a home, garage, shed, or any partially enclosed space, even with doors and windows open.
- Safe Distance: Position the generator at least 20 feet (6 meters) away from your home, and ensure its exhaust is directed away from all windows, doors, and vents. A cross-wind can carry exhaust back into your home, so always be mindful of wind direction.
- CO Alarms are Essential: Install battery-operated carbon monoxide alarms inside your home, following the manufacturer's instructions. Test them regularly. These are your early warning system against CO infiltration.
- Recognize Symptoms: If anyone experiences symptoms like headache, dizziness, nausea, or weakness while the generator is running, IMMEDIATELY move to fresh air and seek medical attention. CO poisoning can mimic flu symptoms, but without a fever.
The Shocking Truth: Electrocution Hazards
Water and electricity are a deadly combination. Improper grounding, damaged cords, or operating in wet conditions can lead to severe electric shock or electrocution.
Your Action Plan:
- Dry Conditions are Key: Never operate your generator in rain, snow, or wet conditions. If you must use it in inclement weather, ensure it's protected by a canopy or enclosure that does not block ventilation, but keeps the generator itself dry.
- Inspect Cords: Always use heavy-duty, outdoor-rated extension cords that are properly grounded and free from cuts, fraying, or damage. Check them before each use.
- Proper Grounding: While cord-and-plug connected equipment (like directly plugging appliances into the generator) may not require external grounding by NEC 250.34 (A), if you're connecting your generator to a transfer switch for home backup, proper grounding to an earth electrode system is required (NEC 250.30, 250.34, 250.52). When in doubt, consult a qualified electrician. Your Powermate has a grounding terminal for this purpose.
- Transfer Switch for Home Backup: NEVER "back-feed" your home's electrical system by plugging the generator directly into a wall outlet. This can energize utility lines, endangering utility workers, and can damage your appliances. Always use a professionally installed manual transfer switch and have a qualified electrician perform the installation. Turn off utility power before connecting your generator via a transfer switch.
The Explosive Risk: Fuel Fire and Explosion
Gasoline is extremely flammable and its vapors are explosive. Mishandling fuel is a major cause of generator-related fires.
Your Action Plan:
- Cool Down Before Refueling: ALWAYS turn the generator OFF and allow it to cool for at least two minutes before refueling. Hot engine parts can ignite fuel vapors.
- Ventilated Area: Refuel only in a well-ventilated outdoor area, away from any open flames, sparks, pilot lights, or other ignition sources. Keep cigarettes, lighters, and electronic devices away.
- No Overfilling: Fill the fuel tank slowly and carefully, only to about 1/2 inch from the top. This allows for fuel expansion and prevents spills. Never fill above the red indicator.
- Spill Cleanup: Immediately wipe up any spilled fuel. Allow fuel vapors to dissipate completely before starting the generator.
- Proper Storage: Store gasoline in approved, clearly labeled containers, away from the generator, heat sources, and out of reach of children. Do not store fuel from one season to another unless properly treated with stabilizer. Replace rusted or damaged fuel containers.
The Burn Factor: Hot Surfaces
The muffler, engine, and other components of an operating generator reach extremely high temperatures, hot enough to cause severe burns or ignite combustible materials.
Your Action Plan:
- Keep Clear: Avoid touching any hot surfaces during operation and for several minutes after shutdown. Allow the generator to cool completely before handling or performing maintenance.
- Clear Combustibles: Ensure the generator is positioned far away from any combustible materials such as dry leaves, grass, brush, curtains, or flammable liquids.
- Children & Pets: Keep children and pets away from the operating generator.
Moving Parts & Recoil Hazards
Engines contain rapidly moving parts that can cause serious injury if clothing, hair, or limbs become entangled. Recoil start mechanisms also pose a risk.
Your Action Plan:
- Keep Distance: Keep hands, feet, hair, and loose clothing away from all moving parts, such as the fan, belts, and engine components, during operation.
- Recoil Safety: When using the recoil starter, grasp the handle firmly and pull it smoothly and rapidly. Be prepared for the recoil to retract quickly. Never wrap the rope around your hand or arm.
General Injury Prevention
Beyond the major hazards, general precautions ensure a safer operating environment.
Your Action Plan:
- Stay Alert: Do not operate or service your generator if you are fatigued, under the influence of drugs or alcohol, or not fully alert.
- Level Ground: Always operate the generator on a firm, level surface. Do not operate, store, or transport the unit at an angle greater than 15 degrees, as this can lead to oil starvation or fuel spills.
- No Modifications: Never alter the generator's construction, installation, or block its ventilation. Do not insert objects through air cooling slots.
- No Step: Do not use the generator as a step or a climbing platform.
- Maintenance: Never attempt to start or operate a unit that needs repair or scheduled maintenance. Regular inspections are key.
Understanding Safety Definitions: Your Guide to Critical Information
Your Powermate manual uses specific signal words to draw your attention to important safety information. Understanding these is crucial for your safety:
- DANGER: This means an extremely hazardous situation exists which, if not avoided, will result in death or serious injury. Pay absolute attention here.
- WARNING: This indicates a hazardous situation which, if not avoided, could result in death or serious injury. Proceed with extreme caution.
- CAUTION: This points to a hazardous situation which, if not avoided, could result in minor or moderate injury. Still important, but less severe consequences.
- NOTE: This isn't a hazard warning, but it contains additional information that is important for a procedure or for understanding your generator.
Getting Your Powermate Ready: First Steps to Power
Before your Powermate can light up your life, a few crucial setup steps are required. These steps are foundational for both operation and safety.
Unboxing and Initial Inspection
When your new Powermate generator arrives, take a moment to carefully open the carton, remove the contents, and verify everything is there. Check for any signs of shipping damage.
- What to Do:
- Open the carton and carefully remove all components.
- Verify that all items listed in your specific model's manual are present.
- If anything is missing or damaged, contact Powermate Customer Service at 1-800-445-1805 immediately. Have your model number, serial number, and date of purchase ready.
- Accessory Kit: If your model includes an accessory kit with tools, keep them handy. Note that wheels (if included) are designed for moving the generator on your property, not for over-the-road transport. For models like the CX3500 and CX5500, specific instructions will guide you through installing wheels, frame feet, and handles using the provided pins, washers, bolts, and nuts.
Fueling Your Generator Safely
Proper fueling is paramount for both operation and fire safety. Always treat gasoline with respect.
- Before You Fuel:
- Ensure the generator is OFF and has cooled for at least 2 minutes. Hot engines and fuel vapors are a dangerous combination.
- Place the generator on a firm, level surface in a well-ventilated outdoor area.
- Clean any dirt or debris from around the fuel cap before removing it to prevent contaminants from entering the tank.
- Choosing the Right Fuel:
- Use only clean, fresh, unleaded gasoline with a minimum octane rating of 87 (87 AKI or 91 RON).
- Gasoline containing up to 10% ethanol (E10) is generally acceptable, but non-ethanol premium gasoline is often recommended for better engine longevity and to reduce the risk of fuel system issues.
- NEVER use E85 or gasoline/oil mix.
- Do not attempt to modify the engine to run on alternate fuels.
- Filling the Tank:
- Slowly add fuel to the tank.
- Crucially, do not overfill. Fill only to about 1/2 inch from the top of the fuel tank. This space is vital for fuel expansion, especially in warmer temperatures, and prevents spills. Some tanks may have a red indicator line; do not fill above it.
- Once filled, securely reinstall the fuel cap.
- Safety First: If any fuel spills, wipe it up immediately and allow any remaining vapors to evaporate completely before attempting to start the generator.
- Fuel Storage Note: If you plan to store fuel for more than 30 days, either drain the fuel system completely or use a quality fuel stabilizer. Never use engine or carburetor cleaner directly in the fuel tank.
Adding Engine Oil: The Lifeblood of Your Powermate
The engine requires proper lubrication to run efficiently and prevent damage. Your Powermate will typically come with a bottle of break-in oil.
- Before You Add Oil:
- Ensure the generator is on a level surface.
- Clean the area around the oil fill cap to prevent dirt from entering the engine.
- Remove the oil fill cap/dipstick and wipe it clean.
- Adding Oil:
- Add the recommended petroleum-based engine oil (typically supplied for initial break-in). The type of oil (e.g., SAE 30, 10W-30) will depend on your climate and operating temperature range; consult your manual for specifics.
- Slowly pour oil into the oil fill opening.
- Check the oil level frequently by fully installing the dipstick, then removing it to read the level. Continue adding oil until the level reaches the full mark on the dipstick.
- Some units may have multiple oil fill locations; use only one.
- Low Oil Shutdown: Most Powermate generators are equipped with a low-oil shutdown system. If the oil level drops below a safe operating level, the engine will automatically shut down and will not restart until the oil is refilled to the proper level. This is a crucial protective feature.
Safe Operation: Powering Up Your Powermate
With your generator assembled, fueled, and oiled, it's time to bring it to life. Following these steps ensures a smooth, safe start-up and operation.
The Pre-Start Checklist
Before you even touch the recoil starter, run through this quick but vital checklist:
- Oil Level: Verify the engine oil level is correct.
- Fuel Level: Ensure the fuel tank has enough fresh, unleaded gasoline.
- Positioning: Confirm the generator is secure on level ground, outdoors, at least 20 feet from any structures, with the exhaust pointed away from windows and doors.
- Clearance: Ensure proper clearance around the generator for air circulation.
- No Loads: Disconnect ALL electrical loads (appliances, extension cords) from the generator's receptacles. Attempting to start with a load connected can make starting difficult and potentially damage your generator or appliances.
Grounding Your Generator
Your generator includes a grounding terminal. While direct plug-and-play applications typically don't require external grounding by code (NEC 250.34 (A)), it is absolutely essential if you are supplying power to a manual transfer switch or distribution panel boards for temporary power (NEC 250.30, 250.34, 250.52). The generator's neutral is bonded to the frame, which is standard. If you have any doubts about grounding requirements for your specific use, consult a qualified electrician.
Starting Your Pull-Start Powermate
Most Powermate portable generators feature a manual recoil start. Follow these steps carefully:
- Electrical Loads: Double-check that all electrical loads are unplugged.
- Level Surface: Confirm the generator is on a stable, level surface.
- Fuel Valve: Open the fuel shut-off valve. This allows fuel to flow from the tank to the carburetor.
- Engine Switch: Turn the engine ON/OFF switch to the "ON" position.
- Choke Lever: Slide the engine choke lever to the "Full CHOKE" position (typically to the left). The choke enriches the fuel-air mixture, which is necessary for starting a cold engine.
- Recoil Handle: Firmly grasp the recoil starter handle. Pull it slowly until you feel increased resistance (this is the compression stroke), then pull rapidly and smoothly upwards and away from the generator.
- Recoil Safety Note: Be prepared for the handle to retract quickly. Never let it snap back; guide it gently.
- Engine Starts: Once the engine starts, slowly move the choke lever to the "1/2 CHOKE" position. As the engine warms up and runs smoothly, move the choke lever fully to the "ON" (or "RUN") position. If the engine falters, you may need to briefly move the choke back to 1/2 CHOKE before fully opening it again.
- Warm-up: Allow the generator to run for a few minutes without any load. This allows the engine to stabilize and warm up before connecting appliances.
Connecting Your Load Safely: Avoiding Overload
Once your generator is running smoothly, you can begin connecting your electrical devices. This requires a bit of planning to avoid overloading the generator or individual receptacles. Explore Powermate generator models to understand the specific wattage capabilities of each unit.
Understand Your Generator's Limits:
- Total Wattage Capacity: Every generator has a maximum running wattage. You MUST NOT exceed this total wattage by plugging in too many devices.
- Starting Watts vs. Running Watts: Devices with electric motors (like refrigerators, air conditioners, or power tools) require a surge of "starting watts" that can be 2-3 times their continuous "running watts." Always factor in starting watts when calculating your load.
- Calculation Tip: If a device lists only volts and amps, multiply them to get watts (Volts x Amps = Watts).
- Individual Receptacle Limits: Each receptacle on your generator also has a maximum amperage and wattage capacity, protected by its own circuit breaker. Do not overload individual receptacles.
Receptacle Types & Cord Selection:
Your Powermate may feature several types of receptacles:
- 120 Volt AC, 20 Amp Duplex (NEMA 5-20R):
- Usage: Powers common 120V AC, single-phase, 60 Hz loads up to 2400 watts (2.4 kW) or 20 Amps.
- Protection: Overload protected by a 20 Amp push-to-reset circuit breaker.
- Cords: Use 3-wire grounded cord sets rated 125 Volts at 20 Amps or greater. Keep extension cords to 15 feet or less for optimal performance and safety. GFCI versions (if equipped, common on CX5500 CARB models) will have a TEST/RESET button.
- 120 Volt AC, 30 Amp (NEMA TT-30R / NEMA L5-30R):
- Usage: Designed for heavier 120V AC, 60Hz, single-phase loads up to 3600 watts (3.6 kW) at 30 Amps (e.g., RVs, some larger appliances).
- Protection: Overload protected by a 30 Amp push-to-reset circuit breaker.
- Cords: Use 3-wire cord sets rated 125 Volts AC at 30 Amps or greater. The NEMA L5-30R requires a twist-lock plug.
- 120/240 Volt AC, 30 Amp (NEMA L14-30R):
- Usage: Powers both 120V AC (up to 2760 Watts / 2.7 kW at 23 Amps) or 240V AC (up to 5520 watts / 5.5 kW at 23 Amps), 60 Hz, single-phase loads. This is typically for larger household circuits or powerful tools.
- Protection: Protected by a 2-pole 23 Amp toggle switch circuit breaker.
- Cords: Requires a 4-wire grounded cord set rated 250 Volts AC at 30 Amps or greater. Uses a NEMA L14-30 twist-lock plug.
Connecting Appliances:
- Plug in Devices: Start by plugging in your largest load item first, then smaller ones.
- Monitor Load: Keep track of the total wattage of all connected devices. Do not exceed the generator's running wattage capacity.
- Circuit Breakers: If a circuit breaker trips, it means you've overloaded that circuit. Unplug some devices, wait a moment, then push the breaker to reset it. Never try to bypass or "fix" a tripping circuit breaker.
Shutting Down Gracefully
Proper shutdown procedures are just as important as starting to ensure the longevity of your generator and safety.
- Disconnect Loads: First, turn off all appliances and unplug them from the generator's receptacles.
- Cool Down (No-Load): Let the engine run at no-load for several minutes (typically 2-5 minutes). This allows internal temperatures to stabilize, which is better for the engine.
- Engine Switch: Move the engine ON/OFF switch to the "OFF" position.
- Fuel Valve: Close the fuel shut-off valve. Under normal conditions, allow the generator to run until the carburetor bowl runs out of fuel and the engine stops. This helps prevent stale fuel issues. In an emergency, simply switch to OFF.
- Cool Completely: Allow the generator to cool completely before covering or moving it.
Keeping Your Powermate in Top Shape: Essential Maintenance
Regular maintenance isn't just about extending your generator's life; it's about ensuring it operates safely and reliably when you need it most. While an Independent Authorized Service Dealer (IASD) is recommended for complex tasks, many routine checks are easily done by the owner. Note that while emissions control work can be performed by any repair shop, free warranty service typically requires an IASD.
Preventive Maintenance: Daily Checks
A few minutes before and after each use can prevent major headaches.
- Cleanliness: Clean the generator daily, especially if used in dusty or dirty conditions.
- Clear Muffler Area: Keep the area around and behind the muffler free from any combustible debris (leaves, grass, etc.).
- Cooling Air Openings: Inspect cooling air openings for blockages. Never insert objects through these openings.
- Exterior Cleaning: Use a damp cloth, soft brush, vacuum, or low-pressure air (not exceeding 25 psi) to clean the exterior surfaces. DO NOT use a garden hose or pressure washer, as water can damage electrical components and engine parts.
Engine Oil: Inspection and Changes
Engine oil is critical for lubrication and cooling.
- Inspect Level: Check the engine oil level prior to each use or every 8 hours of operation. Always allow the engine to cool before checking.
- Change Oil: Change the oil more frequently if operating in extreme conditions (very hot, very cold, very dusty). It's best to change the oil while the engine is warm (but not hot) as it drains more completely.
- Procedure:
- Safety First: Disconnect the spark plug wire to prevent accidental engine start-up.
- Place a suitable container under the oil drain plug.
- Remove the drain plug and allow all the old oil to drain out.
- Reinstall the drain plug securely.
- Refill with the recommended type and amount of new engine oil, checking the dipstick to ensure the level is within the safe operating range.
- Dispose of used oil responsibly at an approved recycling center.
Air Filter: Protecting Your Engine
A clean air filter is vital for engine performance and longevity. Service it more frequently if operating in dirty or dusty conditions.
- Procedure:
- Locate the air filter cover (often secured by a knob).
- Turn the knob and remove the cover.
- Carefully remove the air filter element.
- Wash the filter in soapy water.
- Squeeze it dry (DO NOT TWIST) with a clean cloth.
- Ensure the filter is completely dry before reinstalling.
- Clean the inside of the air filter cover before re-installing it.
- Replacement: If the filter is damaged or excessively dirty, replace it. You can order new filters by calling 1-888-436-3722.
Spark Plug: Ignition Power
A healthy spark plug ensures reliable starting and efficient combustion.
- Inspection: Clean around the spark plug area before removing it. Remove the spark plug and inspect it for signs of wear, pitting, burning, or cracks. The electrode gap is critical.
- Gap Adjustment: Use a wire feeler gauge to check the electrode gap. It should be between 0.028-0.031 inches (0.7-0.8 mm). Adjust if necessary.
- Replacement: If the spark plug is pitted, burned, cracked, or excessively fouled, replace it with ONLY the recommended replacement plug specified in your manual.
- Installation: Install the spark plug finger-tight, then tighten an additional 3/8 to 1/2 turn with a spark plug wrench. Do not overtighten.
Muffler & Spark Arrestor: Noise and Fire Prevention
The muffler reduces engine noise, and the spark arrestor (if equipped) prevents hot carbon particles from exiting the exhaust and potentially starting a fire.
- Muffler Inspection: Regularly inspect the muffler for any damage, cracks, or loose connections.
- Spark Arrestor: If your generator is equipped with a spark arrestor (common for models sold in California and other regions with fire safety regulations), inspect it for damage or carbon blockage. Operating on forest, brush, or grass-covered land without a functional spark arrestor may violate local laws (e.g., California Public Resource Code, Section 4442).
- Cleaning (CARB models):
- Loosen the screw on the spark arrestor housing.
- Remove the retainer clamp and retainer.
- Remove the spark arrestor screen.
- If the screen is torn or damaged, replace it. Otherwise, clean it thoroughly with a commercial solvent and a wire brush to remove carbon deposits.
- Reassemble all components in reverse order, ensuring the screen is properly seated.
Valve Clearance (Advanced)
Valve clearance is critical for engine performance. Checking and adjusting it is a more advanced task.
- When to Check: Check after the first 50 hours of operation, then periodically thereafter.
- Specifications:
- Intake: 0.1mm ± 0.02mm (cold)
- Exhaust: 0.15mm ± 0.02mm (cold)
- Recommendation: If you're uncomfortable performing this task, it's highly recommended to take your generator to an Independent Authorized Service Dealer (IASD).
Storing Your Powermate for the Long Haul
Proper storage prevents damage, ensures your generator is ready for its next use, and prolongs its lifespan.
General Storage Practices
- Location: Store your generator in a clean, dry area, away from direct sunlight, excessive heat, and any ignition sources (like water heaters or furnaces).
- Cool Down: Always allow the unit to cool completely to room temperature before covering or storing.
- Cover: Use a suitable protective, moisture-resistant cover to keep dust and moisture out.
- Periodic Run: It's recommended to start and run your generator for 30 minutes every 30 days during long storage periods. This helps circulate oil and keep parts lubricated.
Fuel System Preparation
Fuel left untreated in a generator's fuel system for more than 30 days can become stale, gum up the carburetor, and cause significant damage.
- Option 1: Fuel Stabilizer:
- Add a high-quality fuel stabilizer to the fuel tank according to the stabilizer manufacturer's instructions.
- Run the engine for 10-15 minutes after adding the stabilizer to ensure it circulates throughout the entire fuel system (carburetor included).
- Stabilized fuel can be stored for up to 24 months, but always check the stabilizer's recommendations.
- Option 2: Drain the Fuel System:
- If you choose not to use a stabilizer, or for storage exceeding 24 months, completely drain all fuel from the fuel tank into an approved container.
- Then, close the fuel valve and run the engine until it stops from lack of fuel. This ensures the carburetor bowl is completely dry, preventing fuel varnish from forming.
Engine Preservation
Beyond fuel, prepare the engine itself for storage.
- Change Oil: Change the engine oil before storage. New, clean oil provides better protection against corrosion during inactivity.
- Spark Plug & Cylinder Oil:
- Remove the spark plug.
- Pour about 1 tablespoon (5-10cc) of clean engine oil or spray a suitable fogging agent directly into the cylinder.
- Slowly pull the starter recoil several times (with the spark plug still out) to distribute the oil throughout the cylinder walls. Wear eye protection to prevent oil spray.
- Reinstall the spark plug.
- Valve Closure: Pull the recoil handle slowly until you feel resistance. This indicates the compression stroke and that the intake and exhaust valves are closed, which helps prevent moisture from entering the cylinder.
Troubleshooting Common Powermate Issues
Even with the best preparation, generators can sometimes be temperamental. While this guide doesn't provide specific troubleshooting steps (as they vary by model and are best detailed in your specific manual), remember these general principles:
- Refer to Your Manual: Always consult the "Troubleshooting" section of your Powermate owner's manual first. It contains specific diagnostic charts for common issues like "Engine will not start," "Engine runs poorly," or "No power output."
- Basic Checks: Before calling for service, re-verify the basics: Is there enough fuel? Is the fuel valve open? Is the engine ON/OFF switch in the ON position? Is the oil level correct? Is the spark plug wire connected?
- Professional Help: If you cannot resolve an issue, do not attempt complex repairs. Contact an Independent Authorized Service Dealer (IASD) or Powermate Customer Service at 1-800-445-1805.
Your Power, Your Responsibility: Staying Prepared
Operating a Powermate generator safely is a critical skill for anyone relying on portable power. By diligently following these guidelines – understanding the hazards, performing proper setup, adhering to safe operating procedures, and committing to regular maintenance and mindful storage – you transform a potentially dangerous machine into a reliable lifeline.
Your generator isn't just a piece of equipment; it's a tool for resilience. Treat it with the respect it commands, and it will serve you faithfully, providing hazard-free power whenever you need it most. Stay informed, stay prepared, and stay safe.